
When your air conditioner runs, you expect cool, refreshing air. But what if it’s also circulating dust, allergens, and mold spores? Or what if it’s working harder than ever, driving up your energy bills just to keep you comfortable? Simply changing the air filter is a vital first step, but it doesn’t address the deep-seated grime that accumulates within the complex machinery of your HVAC system. Over time, this buildup silently degrades performance, pollutes your indoor air, and puts immense strain on critical components.
This guide demystifies the professional AC cleaning process. We will walk you through every step a certified technician takes, from the initial diagnosis to the final system checks. You’ll understand not just what we do, but why each action is crucial for restoring your air conditioner’s power, improving your home’s air quality, and protecting your long-term investment.
The Unseen Threat: Why Your AC Needs More Than Just a Filter Change
A clean air filter is the first line of defense, but it’s far from the whole battle. The internal components of your air conditioning system are a prime breeding ground for contaminants that a simple filter change can’t resolve. Understanding these hidden problems reveals why a professional deep cleaning is essential AC maintenance.
Beyond Basic AC Maintenance: The Hidden Problems Deep Cleaning Solves
Routine AC maintenance, like filter changes, is crucial, but a professional cleaning addresses issues developing deep within the unit. Grime on the evaporator coils can lead to reduced cooling capacity, while buildup on the blower wheel restricts airflow. These are not user-serviceable parts. A deep clean removes this performance-robbing accumulation, restoring the system to factory-fresh efficiency that basic maintenance alone cannot achieve.
The Invisible Accumulation: Mold, Allergens, and Biofilm
The dark, damp environment inside your indoor unit is an ideal habitat for mold, bacteria, and allergens. As air passes over the evaporator coils, moisture condenses, creating a perfect surface for these contaminants to thrive. This “biofilm” can coat internal components, releasing microscopic particles into your home every time the system runs, directly impacting your indoor air quality and potentially aggravating allergies and respiratory issues.
Performance Drain: How Dirt Steals Your Cooling Power and Energy Efficiency
Dirt and grime on AC coils act as an insulating blanket, severely reducing the system’s ability to cool your home and forcing it to consume more energy.
Dirt and dust act as insulators. When a layer of grime coats the evaporator and condenser coils, it severely hampers their ability to transfer heat. The evaporator coil struggles to absorb heat from your indoor air, and the condenser coil can’t effectively release that heat outside. This forces the compressor—the heart of your air conditioner—to run longer and work harder to reach the temperature set on your thermostat, leading to a noticeable drop in performance and a significant increase in energy consumption.
The Lifespan Factor: Protecting Your Investment from Premature Failure
An HVAC system is a major home investment. A dirty system is a strained system. The increased workload on the compressor and fan motors due to restricted airflow and insulated coils leads to overheating and excessive wear and tear. This chronic strain can cause premature component failure, leading to expensive repairs or even a full system replacement long before its expected lifespan is over. Professional cleaning is proactive protection for your investment.
Before We Even Arrive: Preparing for Your Professional AC Cleaning Service
A smooth and efficient service visit begins before the technician arrives at your door. A little preparation ensures our team can get straight to work, maximizing their time and delivering the best possible results for your HVAC system.
The Initial Consultation: Understanding Your Needs and System
When you first call to schedule a service, we’ll ask a few key questions. We want to know the age and model of your air conditioner, any specific issues you’ve noticed (like strange noises or weak airflow), and your primary concerns, such as improving air quality or reducing energy bills. This initial conversation helps us understand your system’s history and tailor the service to your specific needs.
Scheduling and Confirmation: What to Expect from Your AC Service Provider
Once we have your information, we’ll find a convenient appointment time that works for your schedule. You will receive a confirmation via email or text message that outlines the date, time window for arrival, and the name of the assigned technician. We believe in clear communication, so you’ll also get a reminder notification as your appointment day approaches, ensuring there are no surprises.
Pre-Service Checklist: Simple Steps for a Smooth Technician Visit
To help us work efficiently and safely, there are a few things you can do. First, ensure there is a clear, unobstructed path to both your indoor unit (often in a closet, attic, or basement) and the outdoor condenser unit. For the outdoor unit, trim back any shrubs or remove debris to provide at least two feet of clearance on all sides. Finally, please secure any pets to ensure their safety and the technician’s.
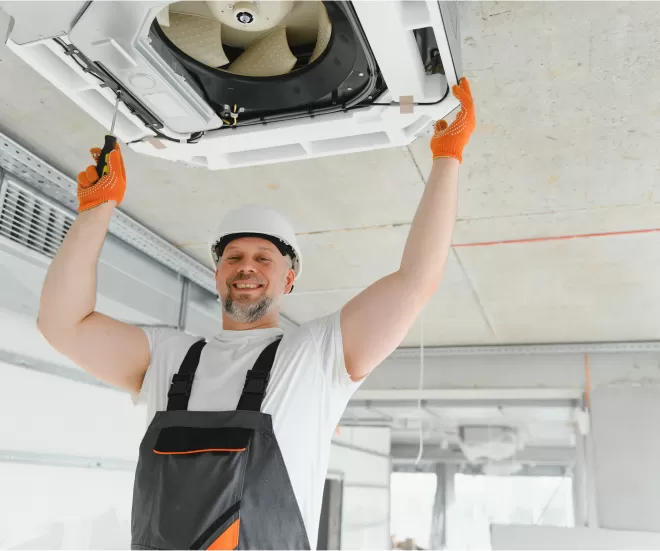
Step 1: The Grand Entrance & Initial System Diagnosis
The moment your technician arrives, the process of restoring your system’s performance begins. This initial phase isn’t about cleaning yet; it’s about a thorough investigation to understand the current state of your air conditioning system and identify any underlying issues.
Professional Arrival: What Our NATE-Certified Technicians Bring to Your Door
Our technicians arrive in a clearly marked vehicle, wearing a professional uniform and carrying the specialized tools required for the job. They are NATE-certified, meaning they have passed rigorous industry testing to prove their real-world knowledge of HVAC systems. They will greet you courteously, listen to any concerns you have, and explain the plan for the service before starting any work.
Comprehensive System Inspection: First Look at Your HVAC System
Before turning anything off, the technician will perform a preliminary operational check. This involves turning on the air conditioner and observing its initial performance. They will check the air temperature coming from the vents, listen for any unusual sounds from the indoor or outdoor units, and confirm that the thermostat is communicating correctly with the HVAC system. This baseline test provides crucial context for the work ahead.
Diagnostic Tools in Action: Assessing Current Performance and Potential Issues
With the system running, the technician will use professional diagnostic tools. A digital thermometer measures the temperature differential between the air going into and coming out of the system, a key indicator of performance. Anemometers may be used to measure airflow velocity at the registers. These precise measurements replace guesswork with hard data, allowing us to accurately assess the system’s current operational efficiency.
Identifying Problem Areas: From Airflow to Refrigerant Levels
This initial diagnosis helps pinpoint problem areas. Weak airflow might suggest a clogged filter or a dirty blower wheel. A poor temperature split could indicate dirty coils or an issue with refrigerant levels. The technician will also visually inspect for signs of a water or refrigerant leak. This comprehensive assessment ensures that the cleaning process targets the root causes of any performance issues.
Step 2: Safety First – Power Disconnection & Home Safeguarding
With the initial diagnosis complete, the technician’s top priority shifts to ensuring a safe work environment for both themselves and your home. This involves a strict protocol for powering down the equipment and protecting your property from any dust, debris, or water generated during the cleaning process.
Prioritizing Your Safety: The Crucial Power Disconnect
Before any cleaning begins, the technician must completely de-energize the air conditioning system. This is a critical safety step. They will first turn the system off at the thermostat. Then, they will shut off the power at the circuit breaker for the indoor air handler and at the exterior disconnect box for the outdoor condenser unit. This eliminates any risk of electrical shock or accidental startup during service.
Protecting Your Household: Laying Down Protective Coverings
Your home’s cleanliness is our priority. The technician will lay down drop cloths or protective floor coverings around the indoor unit’s work area. This simple but important step ensures that your floors, carpets, and nearby furniture are shielded from any potential drips, dust, or cleaning solutions used during the deep cleaning process, leaving your home exactly as we found it.
Creating a Clean Work Zone: Containing Dust and Debris
The deep cleaning process will dislodge a significant amount of dust and debris that has accumulated inside your system over time. To manage this, the technician establishes a contained work zone. They will have a vacuum and cleaning supplies at the ready to immediately capture any contaminants as they are removed, preventing them from spreading into your living space and compromising your air quality.
Step 3: Deep Dive into the Indoor Unit – The Heart of Your Home’s Air
The indoor unit, or air handler, is where the magic of cooling happens and where the most significant impact on your indoor air quality originates. This step involves a meticulous disassembly and cleaning of its core components to restore airflow and cooling power.
Disassembly for Access: Carefully Opening the Air Handler
To access the critical components, the technician will carefully remove the service panels from the indoor air handler. This requires precision and knowledge of how different systems are constructed. Once open, they gain direct access to the evaporator coils, the blower assembly, and other internal parts that are inaccessible to a homeowner.
The Blower Assembly & Motor Deep Clean: Restoring Optimal Airflow
The blower wheel, which looks like a hamster wheel, is responsible for pushing all the conditioned air through your ductwork. Over time, its blades become caked with a thick layer of dust and grime, which severely restricts airflow and strains the motor. The technician will carefully remove the entire blower assembly, meticulously clean each blade, and then clean the motor housing to ensure it can run efficiently and move the maximum volume of air.
The Evaporator Coils: Meticulous Cleaning for Peak Cooling Power
The evaporator coils are the single most important component for cooling. The technician will apply a specialized, non-acidic coil cleaning foam that penetrates deep into the coil fins. This solution breaks down stubborn grime, dust, and biofilm. After letting it dwell, the coil is thoroughly rinsed with water, washing away years of buildup and restoring its ability to effectively absorb heat and dehumidify your air.
Internal Component Check: Inspecting the Expansion Valve and Internal Ductwork
While the unit is open, the technician performs a visual inspection of other key parts. They check the thermal expansion valve for proper operation and look at the visible sections of internal ductwork and the drain pan for signs of mold, leaks, or degradation. This proactive check can identify potential issues before they escalate into major problems, ensuring the entire system is in good health.
Step 4: Clearing the Path – The Condensate Drain Line Service
Moisture is a natural byproduct of the cooling process, and your HVAC system has a dedicated drainage system to manage it. A clog in this system can lead to serious water damage and system shutdowns. This step focuses on ensuring that path is clear and clean.
The Silent Culprit: Why a Clogged Drain Line is a Major Air Conditioning Problem
As your air conditioner pulls humidity from the air, water condenses on the cold evaporator coils and drips into a drain pan. From there, it flows out through a condensate drain line. If this line becomes clogged with algae, slime, and debris, the water backs up. This can cause the drain pan to overflow, leading to significant water damage to your ceilings, walls, or floors, and it will trigger a float switch that shuts down your entire air conditioning system.
Comprehensive Drain Line Cleaning: Flushing and Sanitizing
The technician will locate the drain line’s access point and use a specialized vacuum or high-pressure nitrogen to forcefully clear any blockages. This process flushes out all the accumulated sludge and gunk, restoring proper flow. After the line is cleared, they will flush it with water to confirm that drainage is swift and complete, ensuring water is being properly channeled away from your home.
Preventing Future Issues: Antimicrobial Treatments and Leak Prevention
To help prevent future clogs, the technician may place a slow-release antimicrobial tablet in the drain pan. This tablet dissolves over several months, inhibiting the growth of algae and bacteria that cause blockages. They also inspect the drain line fittings for any signs of a leak, tightening connections as needed to prevent small drips from becoming bigger problems.
Inspecting the Drain Pan: Ensuring Proper Drainage and Preventing Mold
Finally, the technician will thoroughly inspect and clean the drain pan itself. They remove any standing water and sludge, then wipe the pan clean. This removes a primary source of mold and mildew growth from within your HVAC system. They also ensure the pan is properly sloped toward the drain to prevent water from stagnating, which further improves drainage and protects your air quality.
Step 5: Revitalizing the Outdoor Workhorse – The Condenser Unit Overhaul
The outdoor condenser unit is your system’s tireless workhorse, responsible for releasing all the heat collected from inside your home. Its location exposes it to the elements, making a thorough cleaning essential for maintaining system efficiency and performance. This final cleaning step ensures the entire heat exchange process functions optimally.
The Outdoor Disassembly: Accessing the Condenser Coils
To properly clean the condenser, the technician will first remove the protective top grille and fan assembly. This provides unobstructed access to the interior of the unit and the all-important condenser coils. This careful disassembly is crucial for a 360-degree cleaning, rather than just spraying the exterior, which can push debris deeper into the coil fins.
Comprehensive Condenser Coil Cleaning: Removing Nature’s Debris
Over the year, the condenser coils become clogged with dirt, dust, grass clippings, cottonwood seeds, and other airborne debris. This buildup traps heat, forcing the compressor to work much harder. The technician will apply a specialized coil cleaner and then use a low-pressure sprayer to rinse the coils from the inside out, safely pushing all the accumulated debris away from the unit without damaging the delicate aluminum fins.
Reassembly and Final Inspection: Putting It All Back Together
After the coils are clean, the technician will inspect the unit’s interior, clearing out any leaves or debris from the bottom. They will then carefully re-install the fan motor and top grille, ensuring all screws are tightened and electrical connections are secure. They will also check that the unit is level on its pad, as an unlevel unit can cause premature wear on the compressor’s motor bearings.
Final System Test and Performance Verification
With both indoor and outdoor units cleaned and reassembled, the technician will restore power and perform a final operational test. They run the air conditioner and re-check the temperature differential and airflow to verify improved performance. This final check confirms that the cleaning has successfully restored the system’s efficiency, ensuring it delivers powerful, cool air while consuming less energy.
A professional AC cleaning service is far more than a simple wipe-down; it’s a comprehensive revitalization of your entire HVAC system. As we’ve detailed, every step—from the initial diagnostic to the meticulous cleaning of both indoor evaporator coils and the outdoor condenser unit—is designed to address the root causes of inefficiency and poor air quality. By removing the insulating layers of dirt and biofilm, clearing blockages, and ensuring optimal airflow, the service directly restores your air conditioner’s cooling power and energy efficiency.
This proactive AC maintenance is a direct investment in your home’s health, your family’s comfort, and the longevity of your equipment. You can expect to experience improved air quality with fewer allergens, more consistent temperature control, and lower energy bills. More importantly, by reducing the strain on critical components like the compressor, you are actively preventing costly breakdowns and extending the lifespan of your system.
If you’re noticing weak performance, musty odors, or rising utility costs, don’t wait for a system failure. Take the next step by scheduling a professional cleaning service. It’s the most effective way to ensure your air conditioner runs at peak performance, delivering clean, cool, and efficient comfort all season long.